Knitting Technique on Edge - and on the Double (Knitting, that is)
Where has this beautiful border technique been hiding?
I am in love with stockinette stitch; that graceful V is the reason I wanted to knit as a child. It’s elegant, unassuming, and versatile. A stockinette scarf or afghan that includes some lovely traditional 4x4 rope cables framed with a couple of garter stitch columns always catches my eye.
But, if you’re knitting flat - the curling. Ah, the curling. I can’t begin to count the number of shawls, scarves, baby blankets etc. that I’ve knitted in stockinette-based patterns with a four-stitch garter or seed stitch border to help the work lie flat. It’s effective, but I’m seldom 100% happy with the look. I would love for that stockinette to continue right to the edge so the pattern remains unbroken.
There are other stitches that don’t curl: in addition to garter and seed, moss and basket weave come to mind. They’re lovely but they have their drawbacks. You know what they are, so I won’t bore you - at least not today. At least not about that.
Enter the Double Knitting Border.
I can’t believe this is a new innovation, but I have read countless patterns, books and magazines in the 25 years I’ve been knitting, and in none of those publications have I seen any reference to the double knitting border. I first learned of it from Lucy Neatby, in her Foundations of Double Knitting course on Craftsy. She mentioned the technique in passing, and I was intrigued - but too focused on learning the double knitting technique in general to pay much attention. Months later I remembered, and commenced googling..
The how-to was frustratingly hard to unearth, probably because of the terms I used. I promise I will share the video instructions in a moment (feel free to scroll down to the YouTube video from NimbleNeedles), but when I searched ‘slip stitch edge or ‘slip stitch selvage’ I got tutorials on slipping the first/last stitch of a row for a neat edge. When I searched “double knitting selvage’ I got techniques for creating closed or open edges for double knitting fabric. The fact that double knitting is both a technique and a yarn weight further muddied the search results.
Even after I had winnowed down my search terms to return the info I was looking for, I got a hodgepodge of conflicting instructions. Some said to slip with yarn in front, some said to slip with yarn in back, and one didn’t say anything - it was just a YouTube short with the technique quickly demonstrated on the right side of the fabric only (but the knitter’s nails were on point). One version seemed to hold promise, but the written instructions that accompanied the video were worse than useless.
I tried a couple of the swyif and swyib versions in my search results, unsuccessfully, and my brain sort of froze for a while - but then I found the NimbleNeedles YouTube tutorial below, in which Norman demonstrates 10 neat edges. The double knitting border starts at the 20:16 mark. Below the tutorial video are some photos of my own successful preliminary results.
My Results So Far
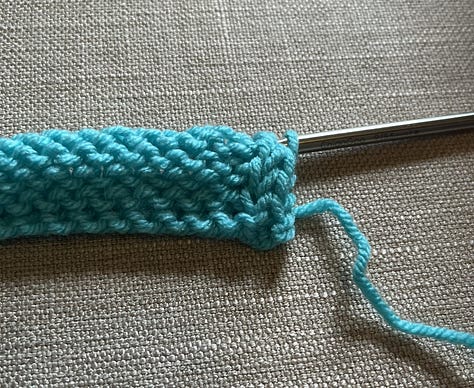
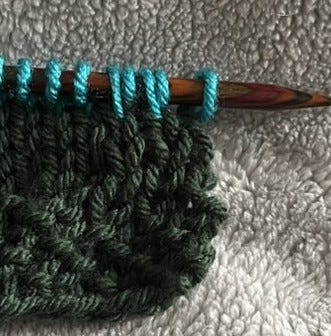
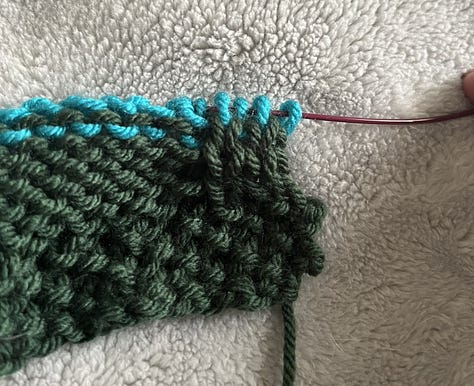
Norman demonstrates a three-stitch double knitting border in the video; I was successful with this and then decided to increase the border to five stitches. See captions below the photos for more info; I didn’t want to delay posting, so the photos aren’t the best but I’ll try to update them as I get further along. Norman’s video shows clearly what the three-stitch version looks like.


Additional Notes
The five-stitch is created by adding one additional repeat of k1s1 or one s1k1 (see video for more info).
Note that the stitches that are slipped in the color change are completely invisible on both sides, which makes this a beautiful border for multicolor projects. This is most obvious on the wrong-side photo.
It’s hard to see in the middle photo, but the transition from the main body to border is nearly undetectable on the right side, and the transition from the seed stitch bottom edge to the double knitting vertical border flows well.
The double knitting border may not produce a completely flat fabric in all circumstances: on another piece not photographed I tried a five-stitch border on each side with five stitches of stockinette in the middle for a total of 15 stitches and this resulted in the whole fabric curving under from side to side instead of just the edges curling; after I’d knit 10-15 rows the fabric formed almost a half-circle. I don’t think this would have happened with the three-stitch border and I don’t expect it with the throw I’m working with the five-stitch border. I believe my problem was one of proportion.
As mentioned earlier, I will update this post as I continue with both of the projects above, which are for similar width throws and which I will be working at the same time.


I too didn't know this edge. Thank you for showing me. As you say, great for stocking stitch 😉
I've never seen this technique or heard it mentioned before, Cate! Really grateful for the ton of research you did to find such a clear video tutorial. I'll definitely be trying this one out!